Showing posts with label Cook Menu. Show all posts

Monday, October 28, 2013

Mama's Easy Stir Fry Dinner

Hey everyone !

Its been awhile but I'm back to post up a new recipe. I hope you all enjoy !

Prep time: 15 minutes

List :
1 steak, 1/2 inch , medium size
small 1/2 size yellow pepper
small 1/2 size green pepper
small 1/2 size red pepper
1/2 cup red onion
1/2 cup white onion
1/2 clove of garlic/ minced
1 teaspoon Extra Extra virgin olive oil or Sesame oil
3 tablespoons of Soy Sauce
1 cup long grain white rice ( optional: instant rice, rice cooker and steam rice bags )
2 cups water
1 boiling pot
1 medium size frying pan


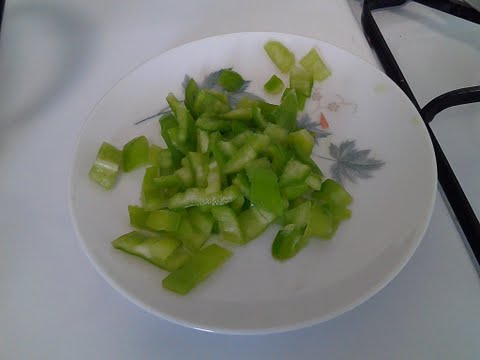
Okay, this going to be a quick prep, your going to cut all your pepper the long way. Which means your pepper should be standing when you slice down into it. Mince your garlic and thin slice your steak into strips.

Now, go ahead and start heating you frying pan on high medium heat and boil 2 cups of water in your pot. This will also be on high medium heat. Pour in your virgin olive oil in the pan, let heat for a couple seconds.

Next put in your sliced steak strips in the frying pan. Note, your steaks should be bright red when your first put them in, your going to cook your steaks until medium rare.

While the steaks are heating, put in your 1 cup of rice in your boiling water and cover with top to steam.

After, your next step is to throw in your peppers, onions and garlic in the pan. Stir fry with your wooden spoon by swiping along the side of the frying pan repeatedly.

When your vegetables look semi soft, pour over your soy sauce and continue to stir until steak is fully cooked.


Be sure to check on your rice, if this is your first time. Don't poke your rice to much, it will turn to mush. (Unless you chose the instant rice or rice cooker option)

Once done, let rice cool for a couple minutes.

Then ! .. Grab your fancy dinner plate, serve rice first in the center, top rice with the stir fry and for extra taste. I like to add soy sauce again lol

Thanks for reading!

Enjoy !


Saturday, July 20, 2013

Dinner in 25 minutes !

Hey Everyone !

Today we are going to cook up some Smoked mesquite pork chops with a side of white rice, just in 25 mins. Its Quick and easy and just a few ingredients.

List :

* 1 med frying pan
* 1 small soup pot
* 1 med bowl
* (2) 1/2 inch. pork chop
* 1/4 cup of extra virgin olive oil
* 1 cup of white rice
* 2 cups of water
* Weber brand smoked mesquite seasoning
* 1 tsp of canola oil
* 1 pair grill safe tongs
* 1 wooden spoon

Okay, your going to grab your thawed out pork chops and place them in your bowl. Pour in the olive oil and Weber seasoning. Next your going to flip your chops over and mix the marinade all together evenly. If you see quite a bit of olive oil at the bottom of the bowl. That's fine, because your going to let your chops chill in the refrigerator for 1 hour before cook time. By then, your pork chops will have adsorbed the olive oil and seasoning.

After a hour has passed, your next step will be to the white rice. Grab your pot and set on med. temp. on stove, place your canola oil in while heating.

 Next, pour in your white rice and toss together in thee oil. Your going to do this for 1 min. Afterwards, add your 2 cups of water, gently mix to let loose the rice. Cover your pot with a lid and let steam for 15 mins.

While your rice is steaming, your following step will be to fully preheat you frying pan in medium temp. Once your pan is heated, your going to place your pork chops in. (  Do Not grease pan )

Place a lid on your frying pan and let your chops stand for 3 mins, for extra crisp, 4 mins. Then after, flip and let cook for 3 mins. Until desired..

Be sure to check your rice if you see that you need to even out the moisture. Fold in the rice, by swiping your utensil along the rim of pot and fold in the rice from the outside side in. Be cautious not to do this more than once or twice. This can disrupt the amount of steam in pot. Continue steaming until 15 min have passed. Let cool for 5 mins.


And finally ! Grab a plate and eat that baby up !

Thanks for reading everyone .


Friday, June 21, 2013

How to make fried cheese tacos !

Hey everyone !

Today we are going to make some cheesy bell peppered  fried tacos. This simple recipe is quick and easy and great for kids to eat.


List of items:
* 1 medium size frying pan
* 1/2 cup of canola oil
* 1 medium size green bell pepper
* 1/4 of a block of monterey jack cheese
* 4-6 medium size corn tortillas
* 1 pair of tongs

Okay everyone, this recipe is easy peasy. First, your going to wash you bell pepper and dice it into even pieces. I usually cut the pepper into four sections and continue from there.

Once your done, your going to put your cup of oil to heat in your frying pan on medium temperature. While waiting for the oil to heat, your going to cut your cheese into even thin slices. The thicker the slice, the cheesier the taco will be.


Now for your corn tortillas, your going to check if the tortilla breaks if you slightly fold it. If so, you can soften them in the microwave for 30 seconds. Or, you can try your local grocery stores such as Superior and thee North Gate Market, they make their own fresh tortillas daily and are soften.


With your soften tortillas, your going to add your slice of cheese on half of each tortilla and sprinkle diced green bell peppers. Next, fold each tortilla and gently add 2 to the frying pan with your tongs.

Give your tacos 5 to 10 seconds to fry before flipping over. You want your tacos to look slightly golden brown.


Once done, your going to repeat these steps until your reached your desired amount tacos cooked.

Tip 1: Be careful not to drown your tacos in oil, it can cause the cheese to run out. You want the oil level to be as thick as a thin slice of cheese.

Tip 2:  To add rice, Look for the ' How to make Mexican Rice ' recipe under my menu tab.


                        Thanks for reading everyone !

Tuesday, May 14, 2013

How to make Mama's Homemade Mexican Soupa !

Hey everyone !

So its been a couple months since I last blogged.
I know, I know... Where have I been ? You may wonder.

Well, I just moved to my new home, I have spent my time making my home comfortable and just getting to know my new area.

But I'm back and I have a new recipe to share. We will be making me personal homemade Mexican Soupa !


                                                      Est.cook time : 35-45 min


List of Ingredients :  
        
* 1 large soup pot
* 1 bag of sea shell noodles
* 1 can of El Pato tomato sauce
* 1 large Anaheim bell pepper ( chopped )
* 1 garlic clove
* 3 table spoons chicken bouillon
* 6-8 thin slices of ham or 3-4 beef weenies
* 1/4 of a small white onion ( chopped )
* 1 large wooden cooking spoon
* 1 tablespoon canola oil
* 6-8 cups of water


  Okay Cheff ! , now your going to preheat your soup pot at medium temperature. Next, your going to throw in your raw noodles with your tablespoon of canola oil. With your large wooded utensil, your going to start mixing your oil and noodles all together generously. Our goal is to fry the noodles until they are golden brown, when they have reached perfection.


  Add 6 cups of water ,1 can of El Pato sauce, 1 can of plain tomato sauce to the soup pot and mix well. While your soupa is slowly heating, this is a good time to chop your white onion and Anaheim bell pepper.


  With thee garlic clove you are going to mince and once all vegetables are cut, add them all to the soup pot.


  Next your going to grab your ham or beef dogs and chop into desired size. Once done, add your meat to your soup pot and mix generously. Then, your going to wait 10 mins for your soupa to boil before you add your chicken bouillon season. While adding your season, be certain to mix your soupa while doing so. To guarantee your season has fully dissolved.


  After, your going to let your soupa simmer for 15-20 minutes. You will also NOT be covering the soup pot with a lid. This can cause your vegetables to soften too quickly before the meat and noodles and fully cooked. ( soggy veg. )


Once the standing simmering time has passed, fold in the soup while mixing. You will be checking if your noodles have expanded and soften. If more added time is needed to cook, simmer for 5-10 minutes more.


  By now, your Mexican Soupa should be hot and ready to eat ! .....Enjoy !


  And if your feeling adventures, try your soupa with a large spoon of sour cream. This combination is very delicious in my opinion.   (:


 Thank you for cooking with ShipShapeMama !
                                                          Bon Appetite !


Sunday, June 17, 2012

How to make Potato Salad !

Do you love potato salad ?
Well, I have a easy recipe for anyone to make at home. This particular recipe is my sons favorite and he's a critic of good food.

So lets start off by listing what you will need for this 30 minute process.

                                                      List:

4-5 medium Idaho potatoes
1 cup real mayonnaise
1/4 cup of unsweetened relish
4-5 eggs
1 tablespoon of dried or fresh mine parsley
A pinch of garlic salt
1/3 ounce of mustard
2 teaspoon of dried mince onion
1/2 teaspoon black pepper
1/2 teaspoon of dried or fresh mince garlic
1/2 of medium size green bell pepper (minced-not chopped)
1 large microwave steam bag (Ziploc brand)
1 small soup pot
1 large salad bowl
1 large spoon for mixing

Okay chef, we are going to start off by boiling 5-6 cups of water on a medium-high flame. Once the water is at a boil, your going to gently insert the eggs in. Be sure not to drop them in because they will pop open and you might poach your eggs. Your eggs should be completely done in 12-15 minutes.

While your eggs are boiling, your going to peel all your brown potatoes and cut all them in half. Than your going to put them in the steam bag. When inserting the microwavable bag in the microwave, be curtain that you follow the correct directions that is printed on the bag. Your potatoes should be done in 10-12 minutes, the cook time will depend on how large your potatoes are.


While the potatoes are steaming, your eggs should be done. So you will next drain the hot water from the pot and add cold water to cool down the boiled eggs. Once they have cooled, your going to start peeling the egg shells from all the eggs. Once this step is completed, rinse once more your eggs to be curtain they are free of skin or small pieces of shells. Before adding the eggs to the salad bowl, I usually like to cut them in half and take out the yoke. I prefer non boiled yoke in my recipe but this is a optional choice to the cook.

Once you have chosen to keep the yoke or not in your salad. Go ahead and cut the each egg into 6 pieces. When you have completed this step, your potatoes should be done. But let the microwave bag cool down, your going to next add your seasons with your eggs in the bowl. I usually use dried mine garlic, onion and parsley, but if you choose to use fresh. Be sure to wash your vegetables and mince and not chop them. With the green bell pepper, this is usually fresh and it takes 1 minute to mince cut.

After all the seasons are in the bowl. Take your potatoes out the bag and cut them into pieces that you would prefer in size. (Some people like their potato salad in thick chunks lol I'm one of them !) Cutting each half into 4-6 pieces is my preferred method in making my salad. :)

After all your potatoes are cut, add them to the salad bowl. Your going to next add your mayonnaise, relish and mustard. Next, your going to use your large spoon and bring everything into a mix and you want to swipe your spoon along the edges and turn into the center of the bowl. Chopping through the bowl with your spoon may lead to mash potatoes lol

The last 2 items to add is your garlic salt and black pepper. This is by your own taste palate if you want to go heavy on the black pepper, I usually like allot in my potato salad :) ….. lol

If you have chosen to go by my recommendations, good choice !!

After you have mixed your potato salad, it should be ready to eat now !!! Whether its warm or cold, its delicious !


Thanks for reading and cooking with chef Mama!

Friday, January 13, 2012

How to make Chilaquiles !

One of my favorite recipes that I admit is high in carbs for me but yet so delicious is my Chilaquiles. The recipe is so simple but just a little time consuming when frying your own tortilla chips. But everything done right with a dash of love on the side is all worth it, especially when you have a toddler like mine who loves mommy's cooking.

So, lets start what you will need for this fantastic recipe !

Ingredients:
1 frying pot ( soup pot in preferred)
1 wooded utensil for lifting fried chips
1 large bowl to set your chips to cool after frying
1 stack of corn tortillas (about 2 inches in height when stacked)
1 can of pure tomato sauce or if you prefer a hint of spice (El pato sauce)
1-2 large egg

1 small bowl for your sauce
1/2 teaspoon garlic salt (or if no salt wanted) 1/2 teaspoon of freeze dried mince garlic (fresh garlic optional)
2 teaspoon of freeze dried mince onion ( fresh onion optional)
1-2 cup of vegetable oil
1 tablespoon of sour cream
1/6 of a slice of quesco fresco cheese

Okay ! Lets start with grabbing your soup pot and placing your oil inside. Your going to place your pot on the stove to heat on low (low/medium). Once this is done, your going to grab your stack of tortillas and cut them all in half, then your going to cut each half's into 3 pieces. All together you should have 6 sliced stacks of tortillas.

Next, your going to start frying pieces of tortillas in your fried oil. Your pot of oil should have heated enough to fry. If not, turn up the heat so you don't place your tortillas in oil that will make them soggy. When your chips look golden brown, your going to scoop them out with your wooden utensil and place them in your large bowl to collect and cool off. I usually place a paper towel inside my bowl to soak up any excess oil that falls into the bowl.

Once you have completed frying all your tortillas and  then have a large bowl of chips to cook with. Your going empty your pot of oil into a safe container. You will no longer need oil any more.

After you drain your pot of oil and wipe it off with a napkin, your going to place it back on the stove.

Next, your going to grab your small bowl and open up your can of tomato sauce and pour into the bowl. Then this is when you add your mince garlic and onions into your bowl of sauce. Once this is done, your going to next crack open your large egg into the bowl of sauce.

After placed all your ingredients into your bowl of tomato sauce. Your going to use a fork or whisk to scrabble it all together.

Now! your going to than turn on your stove onto medium/ high. Place your pot on the heated stove, pour all your chips into the pot. Even all your chips out!

Next, your going to pour your bowl of sauce into the pot and let it stand for about 2 minutes. After 2 minutes have past. Your going to use your wooden utensil to mix your chips and sauce all together. Don't dive into the pot and crack your chips. You want to start swiping the the edges and turn it over easy to the center of the pot. Your going to continuously do this through out the whole cooking session.

Your Chilaquiles should take about 20-25 minutes to complete.

Be sure to properly check that your chips have mixed well with the sauce and the yoke inside the pot is getting cooked all the way through.

I usually like to cook my Chilaquiles until some of my chips are crisp at the end but some others like it soft. So cook until you see what texture you prefer your food to be.

Once your done cooking, your going to serve your self a bowl or plate of Chilaquiles. Then next, add your slice of quesco fresco cheese and crumble it up on the surface of your food. Add your dash of sour cream on top.

And Waw La ! Your all done and ready to eat!

Thanks for reading !
Bon Apatite !

Monday, December 19, 2011

How to make Homemade MeatLoaf !

Wondering how to make Meat Loaf ? Well, wait no more ! Ship Shape Mama can tell you how !
So lets start what will you need to make you fantastic meal for yourself or family. Personally, my family loves it. I love to see my son eat mommy's cooking and hear him say yum yum yum lol


Ingredients :

* 1 pound of ground beef
* 1/4 of a medium size onion cut into mince style pieces
* 1/4 of a medium size fresh minced garlic (or 1/2 tablespoon garlic)
* 1/2 cup of saltine crackers or animal crackers ( smashed into small crumbs )
* 1 large egg
* 1/2 of a medium size green pepper cut into small even pieces
* 2 teaspoons of Lawry's all season salt
* 1 cup of pure tomato sauce
* 1/2 cup of mixed vegetables ( type of vegetables are optional )
* 1/4 cup of ketchup
* 1/2 teaspoon of black pepper
* 1 can of non-stick spray
* 1 large mixing bowl
* 1 square like baking pan


Okay people ! So lets start by  grabbing our large mixing bowl and adding in our fully thawed out ground beef. Than we are going to set this to the side so we can grab our onion, garlic and green pepper to cut into small even pieces. Once you have diced your vegetables into even pieces, you can go ahead and add this to the bowl of ground beef.


Than your going to add you seasons like your ground pepper and your all purpose Lawry's season salt. Once you have accomplished this. Your going to grab your crackers and put then into a separate bowl or into a napkin folded and start smashing them into pieces with a cup. For example laying your crackers flat and start smashing.


Next, once your complete with this process, your going to throw your crackers into the bowl. After this, crack open you egg and add this to your mixture.


Next your going to add your tomato sauce and 1/8 cup of ketchup. Your going to use the rest of your ketchup later on. By this time, all your ingredients should be added into one large bowl. Your going to next wash your hands and use which ever hand preferred and start hand mixing your mixture of meat very well in your bowl. You want to make sure that everything is mixed properly.


Your going to next set your oven on 400 degrees Fahrenheit, while your oven is per-heating. Your going to grab your square baking like pan and spray it lightly with your non-stick spray. Once you've done that, your next step is adding in your meat loaf mix into the baking pan.


Then, with you hand, your going to even out the meat through out the whole pan.


By this time your oven should have pre-heated, so your going to throw in you meat loaf into the oven for about 30-35 minutes.


After 30-35 minutes have past, your going to check on your meat loaf. It should look pretty close to looking well done. Your going to poke the center with a tooth pick or knife and check the center for pinkness. You should see just a little, like if you only need about 15-20 minutes more.

You can also drain your meat loaf of any excess oil if you used a high in fat ground beef mix, you can take the pan out and slightly drain into a cup or your sink.


So next ! Your going to next going to add the rest of you ketchup on the surface to your meat loaf. You can squirt a design of your own, I usually do an zig-zag line. After this step.


Your going to allow your meat loaf to cook for another additional 15-20 minutes more until its well done to your liking.


By this time, your meat loaf should be ready for consumption !


Dig in, eat up ! And thanks for cooking with Ship Shape Mama !


Bon Appetite !


Thanks for Reading !

Friday, December 16, 2011

How to make homemade Mexican Rice !

Many people give great compliments on how good my Mexican pink rice is. So I decided to let out my cooking secrete and tell people how I make my yummy rice. So lets start what you will need to make this delicious recipe in just 30 minutes !


Ingredients

* 1cup of uncooked rice
* 2 cups of water
* 1 can of tomato sauce ( 1 cup)
* 2 teaspoons of chicken bouillon
* 1 tablespoon of vegetable oil 
* 1 cooking soup pot with lid
* 1 wooden utensil
* 1 teaspoons of freeze dried mince onions ( fresh onion is optional )
* 1 teaspoon of freeze dried mince garlic ( fresh mince garlic optional )


Okay ! ... So lets start by bringing our pot to the stove and adding our vegetable oil in. Turn the stove on and set to medium heat so the oil can heat. Once the oil has heated, add your 1 cup of uncooked rice. Grab your wooden spoon and mix generously into the heated oil. We want the rice to cook a little bit until you see about 10 percent of the rice golden brown.

Once you established that the rice is fried just a little. Your going to add 2 cups of clean fresh water to the pot, mix well. Now, while the water is heating. Pop open your can of tomato sauce and poor into a separate bowl.

Next, your going to add your mince onion,garlic and your chicken bourbon. .... So Why? are we doing this instead of throwing all the ingredients in to the cooking pot. Well, we want to make sure that the chicken bourbon has correctly broken down and dissolved because if we through it in the cooking pot. This might cause someone to over mixing the rice, while trying to see if the chicken bourbon dissolved correctly.

Over  mixing rice can cause soggy rice ! Eww ! No bueno !

Once you made sure your tomato sauce has mixed well with the other added ingredients. Your going to next add your sauce to the pot. By then, your water should have heated but not boiled to the point you see bubbles rising. Your going to mix your sauce clock wise or counter clock-wise about 4 times so your sauce has mixed well with the water and rice.

Next your going to cover your pot with your pots lid and let heat for about 5 minutes. After 5 minutes has past your going to stir once more about 4 times again like you did before. Once you've done that, your going to keep the lid on the pot for 20 minutes on medium heat. If your stove has a dial that reaches 6, leave it on 3 or between 2-3. Over heated the pot can cause over cooking of the rice and the water evaporating to quickly before the rice gets a chance to soften.

After 20 minutes has past, check on your rice by softly tapping the surface with your wood spoon to see if it has soften. If you feel your rice needs to be a little softer, keep your lid on so the rice can steam. Be sure to check the side of the pot where the rice is on the edge, so you can see if you havent burned the rice.

If your rice just needs a little for softening but does not need more time on the stove. One trick is to crank up the stoves heat and let the steam rise with the lid on for a couple of seconds. Once steam has appeared. turn off the stove and remove the pot of rice from the stove to the side and let the steam sit inside the closed pot for 10 minutes. This can reassure than your rice has not burned and it can soften your rice perfectly.

Next, your rice should be perfect and ready to eat !

Dig in !

Thanks for reading !


Wednesday, November 23, 2011

How to make homemade Pinto Beans in 1 day !

 Okay, let me tell you how to make home made Pinto Beans. This process is usually takes two days but I can show you how to make it in 3 hours ! ... And No ! these are not magical beans ! lol

So lets start by listing what you will need, for starters you will need patience lol

Ingredients:

2 cups of dried pinto beans
1 large bowl
1 measuring cup
2 teaspoons of Kosher salt (adding more salt later is optional once cooked)
1/2-1 tablespoon of dried mince garlic
1 tablespoon of dried mince onion
1 large sauce pot with pot lid
1 good sturdy bean smasher and a medium/large wooden spoon
1 cup of milk (maybe optional)


Lets start ! Open your bag of pinto beans and measure 2 cups of beans to pour into a bowl. After your going to add 2-3 cups of cold water into your bowl so you can soak and rinse your beans for 4 minutes. While doing this, boil 7-8 cups of water in your large sauce pot on medium to high temperature.

When your your done rinsing your beans, drain your beans of any excess water. Next, check on your pot of boiling water, it is important to make sure that the water is boiling to the point you can see bubbles rising. Once you have checked and made certain your water is boiling, you can add your pinto beans.

Boil your beans for approximately 5 minutes ! No more than that. After 5 minutes has past, remove your pot from heat and cover your pot with a secure lid.

Now here comes the waiting game, you have to let your beans sit with a cover pot of course for 1 hour to soak.

After 1 hour has past, your beans should look a little soften and enlarged but yet still firm. Your going to drain your beans again and pour again into your bowl you had prior.

Next your going to measure 7-8 cups of water and to bring to boil in your large sauce pot. We have to make sure once again that our water is boiling like before. While your water in boiling, quickly rinse your beans again in 2 cups of room temperature water. Do not let your beans soak in cool water, we want this done quickly.

Now check your boiling water, once you have made sure its boiling. Add your pinto beans and stir gently with you wooden spoon or utensil. Cover your boiling beans with your pot lid and let your beans simmer on medium temperature for 1 1/2 - 2 hours. You may have to stir 3-4 times while your beans are cooking so they do not get stuck to each other or stuck on the pot.

So after a long wait ! lol your beans should look nicely plumped and soft. Now, here comes a little elbow grease. Your going to get your bean smasher, set your pot on low tempt and start smashing. You may develop your own smashing routine and that's perfectly fine ! Kudos ;-)

When your beans are almost smashed completely, you can add your freeze dried mince garlic and onions. Than your salt, if your beans look a little dry or too thick. This is when you add your cup of milk. This is how you get creamy smashed pinto beans.

Once you've added your ingredients, continue smashing until its the way you prefer your beans to be.  Creamy or thick, its your beans and its optional. Continue to heat on low temperature for 5-10 mins and presto ! Your long mission of cooking home made pinto beans is complete! If you feel your beans need more salt, go ahead and add more to your liking. ;-)


Great Job ! And Cool Beans ! lol

Thanks for reading !


Sunday, November 6, 2011

How to make homemade Hamburger helper !


How to make home made Hamburger Helper ShipShapeMama style! lol

Now, I'm the type of person that I believe you don't have to make food from out of a box, food is much nutritious when you cook all your ingredients fresh !

Now lets start what ingredients you will need!

* 1 whole garlic clove or 1 tablespoon freeze dried minced garlic
* 1/2 teaspoon black pepper
* 2 teaspoons of Lawry's all purpose season
* 1 cup of mix vegetables/ variety is optional (can veg. optional)
* 4 medium potatoes or 3 large
* 1/4 of a onion or 2 tablespoon of freeze dried mince onion
* 2 pounds of ground beef
* 1 Large soup pot / wooden spoon

                        est cook time : 40min-1 hour cook time !


Now for the cooking part, lets start by finding a suitable pot to cook in. I prefer a large sauce like pan because its perfect to fry and steam potatoes. Lets preheat our sauce pan on medium, what is medium? Turn your dial on your stove to the center. If you dial is like mine, it goes to 6. So I would set it to 3 for medium. Wait until your pan gets warm enough before adding in your ground beef. You don't want to add your meat to a cold pan. why? Well, a cooking pan must be evenly heated to evenly cook food inside of it. If your pan is unevenly heated, some bits and pieces of food like potatoes will not cook properly.

Okay ! ..When your pot is nice and warm, add your meat. While your meat is slowly cooking, this is a opportunity to skin your potatoes and dice them up into even pieces. This is important because if you have bits of potato bigger than others, your food will not cook evenly. You can end up with over cooked bits of potato with under cook ones. I would suggest to cut your potato in half and than cut the half's into half's again, you should end up with four pieces from one potato. From there you can cut your four piece pretty easily and evenly. Now make sure you check on your meat while slicing and dicing.

Be sure not to cook your meat all the way through, we only wanted cooked half way. Meaning, you should still see pink or redness in your meat.The time your done cutting your potatoes, your meat should be cooked half way. So, this is the time to add you diced potatoes. Be sure to mix your meat and papas well in your pot once you added them. Cover you pot with your lid so it can steam for a few minutes.

While your meat and potatoes are steaming, this is the time to dice up your fresh onion and garlic clove. Be sure again that they are cut evenly ! But if your deciding to use freeze dried garlic and onions, this is fine and good because you know already they are cut evenly.

After your done cutting up your onion and garlic, check on your meat. You should still see pink and remember your heat temperature should still be set to medium.

You next step after checking you meat will be to add your Lawry's all purpose season, black pepper(amount optional), mince onion and garlic. Be certain that once you have added your seasons, to stir your mixture properly. Never cut into the meat with your cooking utensil, be sure to gently start by swiping your cooking tool by sliding it through the walls of your pot and work your way to the center. You don't want to mash up your potatoes because you will end up with soggy mashed up food in fatty oil. Eww ! lol Be gentle with your food !

Now for the important part, once you mixed your mixture well. Cover it again with your lid to the pot and let steam for 6 more minutes. Its important to have the lid closed properly for this process.

After 6 minutes have past, check on your mixture. Your potatoes should be cooked half way through, which means the outside potato bits maybe a little soft but still slightly firm in the center. When you have made sure you are on track cooking, this is the best time to add your frozen/can mix vegetables in your mixture.

If you are wondering why we add our vegetables last..its because they cook very fast and sometimes your store bought vegetables might of been cooked before but just not all the way through.

Once you have added your last ingredient, be sure to mix your mixture well.. but remember ! Gentling mix, so your potatoes do not fall apart. Cover your pot once again and let steam for another 10 minutes. You can slightly turn up the heat at this point but this is optional. Some stoves get hotter than others and gas stoves cook faster than electric stoves. I'm working with a electric stove.

After you 10 minutes have past, your food should be ready ! Be sure to check that your potatoes are cooked all the way through, if not..steam for another 5 minutes. Once your food has finished cooking, this is the most important part in my opinion to reduce the fat.

Be sure to drain your food from excess oil from the pot, do it while your food is still warm and not cooled. When oil cools, it sticks to your food and maybe hard to remove. You can drain the fat from your meat by keeping the lid on the pot and carry your pot to the sink and slowly tip your pot to drain the fat. I keep the lid on while doing this so my food does not spill out into the sink. lol

Once you have done this, you are ready to eat !

Now you may ask your self, what can I eat with this? Well, I enjoy eating 2 tbsp of light sour cream with mine with 2-3 small corn tortillas.  Yummy !


Bonn Appetite !
Thanks for reading !

Wednesday, September 28, 2011

How to make a scrabbled egg sandwich !

Hey everyone, so I thought it would be a good idea to put up a cook menu. Nothing big just something I might start small cooking ideas for easy recipes to do at home.. So here goes....

Simple Egg Sandwich

2-3 medium egg
1/2 teaspoon of mince onion
1/4 teaspoon of freeze dried mince garlic(optional)
pinch of black pepper
1/3 cup of milk
1/2 teaspoon of dried or fresh parsley(optional)
shredded cheddar cheese or 1-2 slices
2 bread slices

Now when I making eggs, I like to add milk to my scrabble egg mixture. About three shakes of the mince onion bottle. That's about half a tablespoon. I like allot of black pepper so add as much as you desired. Now, with freeze dried garlic and parsley. It might sound a little too much but you can easily go to your local 99 cent store or BigLots store and find name brand seasons that have the cost marked down by half. If your familiar with some season like I am, you know Weber and McCormick are kinda pricey for such a small bottle of season that weighs very little..lol;-)

Now add all these things together in a mix, heat your medium size pan on medium heat or set your dial to the center. Make sure you heat your pan before adding your scrabble egg, I usually use Pam non-stick spray but every now and than I will put half a teaspoon of real un-salted butter. Melt the butter in the pan, throw in your egg mix. Before you start to scrabble your egg, wait until the egg heats to the point you can see slight bubbles rising from the center. Start scrabble by sliding your cooking utensiel along the edge of your pan and than work your way towards the center. When the the egg is about 4 minute in cooking time, I like to add some cheese. I continue to scrabble the cheese in to assure it is well mixed with the eggs. Continue to cook for about 5 minutes and your set to go..

While your eggs are cooling, that's when I toast my bread. Fresh bread is also optional, I usually choose a low calorie bread like Wonder bread. Now, sometimes I add a little mayo on my bread but I learned to eat my sandwich without it because I weigh out the thought that I will add ketchup. I also weigh out, that I will add another slice cheese to my sandwich...

When its all put together, it should look a little like this..


thanks for reading ... ;-)

Monday, September 26, 2011

Coming Soon !


Coming soon! Some of my homemade recipes that help me keep in shape. Recipes that you can easily make your self at home. ;-)